Installing a ceiling fan is a great way to stay cool in the summer without putting too much strain on your air conditioner or raising your electricity bills. Once you have a fan picked out, you can hire someone to install it for you or you can handle the job yourself. If you’re comfortably handy and feel confident in your installation abilities, setting up a ceiling fan is easier than you might think. In this blog, we’ll go over a few tips you can use to make the whole process smoother and easier and help you avoid some of the most common pitfalls and mistakes.

The Biggest Mistakes People Make When Installing a Ceiling Fan
If you don’t feel comfortable working with electrical wiring, then you should absolutely hire a professional to handle the ceiling installation for you. Electricity is no joke, and inexperienced do-it-yourselfers can end up putting themselves at risk. Even experienced and confident handymen can make mistakes, so here are a few common ones you should try to avoid when installing your ceiling fan:
- Installing Without Measuring – Once you’ve picked out a fan and read the instructions, it’s tempting to just dive right in and install it right away. However, you need to be careful when you’re choosing a location for the fixture. Failing to measure and plan ahead could leave you with insufficient air circulation. Make sure you measure the slope of the ceiling as well – often times ceilings will appear straight when you’re eyeballing them, but they tend to have a slight slope in one direction or another. You’ll have to take that into account when placing the fixture.
- Leaving the Old Electrical Box – Every ceiling fan comes with an electrical box to hold the wiring. When you’re installing a new fan into an old fixture, you have to remove the old box and replace it with the new one. Remember to turn the power off before this step so you don’t shock yourself.
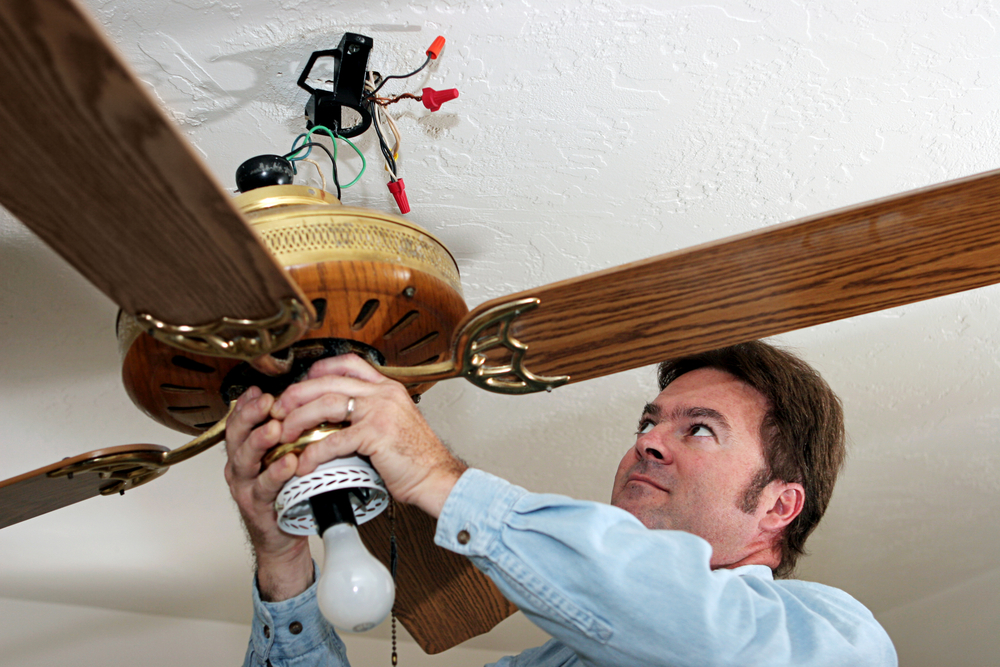
- Assembling the Fan on the Ceiling – While it can be easier to work with the wires if the fan isn’t fully assembled, you need to put the whole thing together before you attach it to the ceiling. If the fan isn’t completely put together, you won’t be able to properly install the ceiling fan screws and the hanging rod, among other things.
- Switching the Power Back On During Installation – We mentioned this a moment ago, but it’s worth repeating: the electricity to that room should be switched off until the process is complete. Installing the fan will involve wiring it into the main electrical system of your house, and if any of those wires are live, you could end up with a nasty shock. Accidental shocks are the most serious and dangerous mistakes you can make when working with electrical systems, so it’s important to be very very careful.
What You Don’t Know About Ceiling Fans Could Cost You – 9 Things to Consider Before Buying a Fan
While you could certainly go out today and pick up a ceiling fan from any big hardware store, you could end up experiencing suboptimal performance if you don’t do a little research into the best-rated ceiling fan reviews first. Here are a few things you should keep in mind before making a purchase:
- Energy Efficiency – The right ceiling fan can cut your AC bill by up to 40% if you install it correctly. However, different fans use different amounts of power. It’s worth spending a little extra on a more efficient fan so you can lower your power bill every month. Look for an Energy Star seal of approval if you can.
- Size the Fan to the Room – A bigger fan isn’t always more effective. It’s important to pick a fan that fits the room you want to install it in. As a general rule, rooms under 50 sq feet require fans with a 29″ blade span, rooms up to 75 sq ft require a 36″ fan, 100 sq ft rooms need a 42″ fan, and large bedrooms or living rooms up to 400 sq ft should have a 52″ fan. If your room is larger than 400 square feet, you might want to consider multiple fans.
- Different Fans for Different Spaces – Bathrooms and outdoor patios require special fans designed to be resistant to moisture. If you install a regular ceiling fan in your bathroom, the dampness from the shower could cause the metal to corrode, and the same goes for outdoor fixtures.
- Blade Pitch – Fan blades are usually tilted between 12 and 15 degrees for optimal air circulation. Make sure every blade is pitched identically to the one opposite it or the fan will wobble as it spins. A more dramatic tilt will increase circulation but can raise the power usage of the fan due to air resistance.
- Fan Motor – The motor is the most important part of any fan and top-rated ceiling fans pretty much always have a higher quality motor. Make sure the motor has heavy-duty windings and sealed bearings with permanent lubrication. Low-quality motors can reduce the energy efficiency of the fan.
- Match the Style to Your Decor – We’ve thrown a lot of technical stuff at you in this section, but keep in mind that a fan is also a piece of decoration for the room. Make sure the lighting and style of the fixture suit the rest of your home decor so the fan doesn’t stand out as a mismatch. Remember, the fan you purchase today could be a part of your home for a decade or longer.
- Fan Warranty – Ideally, you should look for a fan with a lifetime warranty and in-home service. Fixing a ceiling fan can be a real pain, and there are plenty of manufacturers that are willing to send technicians to your home if something goes wrong. However, if you’ve really fallen in love with a fan that has a shorter warranty, don’t let this be the final decision point! If your warranty runs out, you can still have the fan repaired for $100 or so.
- Mount Size – Some fans can be installed flush to the ceiling while others include longer mounts so the fan hangs down. Measure the height of the room before making a purchase so you know which style of mount you should buy, otherwise, you could end up with a fan that hangs too low or sits too high up on the ceiling.
- Control Options – There are a wide variety of controls you can use, typically depending on the model of the fan. Newer smart ceiling fans often come with remotes for easier control, while others still use a switch on the wall.

Choosing The Best Type Of Ceiling Fan For Your Home
Choosing the best fan for your situation will depend on a few factors including your budget, the size of the room, the rest of your decor, and whether you’re looking for an indoor or outdoor fan. We’d recommend picking out the room first and then measuring it. If you’re looking for a whole house fan installation that can keep everyone cool, the living room is the best spot for it. Other popular locations include bedrooms and home offices – anywhere you’re likely to spend a lot of time.
Once you’ve measured the chosen room and figured out which fan size you’re looking for, it’ll come down to how much you’re willing to spend. You can generally find pretty solid budget fans for anywhere between $60 and $120 dollars if you look at reviews and buying guides. If you want something on the higher end, you can expect to spend between $150 and $250. Once you get up to the $300+ range, you’re looking at the fanciest and most high-end fans on the market. These fans often have smart technology like Alexa and Google Home connectivity so you can control them with your phone. Smart fans can get up to $1000, but you can find them as low as $200 or so as well.
8 Tips For Successfully Hanging A Ceiling Fan – From Box To Awesome
Hanging a ceiling fan isn’t the most difficult task in the world, but it is somewhat complicated and usually involves a ton of steps. Instead of listing every step here, we’re going to suggest that you carefully read the installation directions that come with your ceiling fan since they vary by model. We will, however, offer some general tips that can make the process a lot smoother and easier.
- Turn the Power Off – We’ve mentioned this more than once but it’s worth saying once more – make sure you turn off the electricity to the room before you get started. Even if you manage to mess up every other step, succeeding with this one can save you a trip to the hospital.
- Set Aside Some Time – The installation process can take quite a bit of time even if you’re an experienced do-it-yourselfer – up to two or three hours. Set aside a block of a few hours to finish the project, and make sure it’s during the day since you’ll have to turn the lights off.
- Enlist a Friend – Fans are heavy, which makes installing them a two-person job. Having a buddy to hold things in place while you attach the wire nuts for hanging a fixture is extremely helpful, trust us. There’s nothing worse than realizing you’re running out of strength while you’re standing on a ladder.
- Be Prepared for a Workout – As we mentioned before, ceiling fans are pretty heavy, and you’ll have to reach up and hold the fan in place while you’re attaching it to the mount. If you feel yourself getting tired, don’t be afraid to take a break for a few minutes. Letting the project take a little longer is better than accidentally dropping the whole fan on yourself.
- Lay Out Every Part – Ceiling fans come with a lot of small parts like mounting hooks for hanging a light fixture, and it’s a good idea to get them all laid out before you start. This will save you some time later on so you don’t have to dig around inside the box for each little piece, especially if someone is stuck holding up the fan.
- Move the Carpet – If possible, move the carpet out of the way so you can put the ladder on a hard floor. This makes it a little more stable, but more importantly, it makes finding dropped pieces significantly easier. You’re inevitably going to drop some screws here and there, and they’re tricky to find on the carpet. Keep in mind that every little screw stuck in the carpet is another hazard next time you’re walking around barefoot in the middle of the night.
- Make Tight Connections – Because the fan will be spinning around with some force, it can be easy for some wire connections to be shaken loose. Try to make everything as tight as possible so you don’t have to go back in later.
- Bring a Wire Cutter – Along the same lines, using a cutter to trim the wires is a great way to keep everything tightly connected while also preventing a messy look when the project is complete.
Where Can I Find Additional Information?
If you’re a little stuck and you need more information on ceiling fans and their installation, you can always get in touch with a professional. Since ceiling fans are an important part of any temperature control system, most HVAC contractors will have plenty of tips for you, including how to install the fan, where to place it, and how to tailor the rest of your HVAC system to the new fan. If you’re in Marin, Napa, or Sonoma Counties and you have any questions about ceiling fans or other HVAC issues, you can get in touch with Valley Comfort Heating & Air online through our website, over the phone at (707) 539-4533, or in person at our location in Santa Rosa CA.
